


Breadcrumb
Assign, Change or Add Advisors
Introduction
This guide shows the step-by-step instructions on how to assign, change and add advisors for undergraduate and graduate students. We recommend that you become familiar with the following advisor types prior to altering the student's record.
AACA - Academic Advising Center Professional Advisor
ADVR - Faculty Advisor
ATHA - Athletics Academic Advisor - Academic Advising Center
- If a student has a faculty advisor in your department, they would be co-listed with Athletics advisors
CCAA - Centers for Academic Excellence (CCAE) Academic Advisor
- If a student has a faculty advisor in your department, they would be co-listed with CCAE advisors
EOPA - EOP Advisor
- New EOP freshman students have their "Advisor" for the first 3 semesters of attendance. Their EOP advisor assignment should not be changed. The department may add a faculty advisor. The Advisor role for EOP advisors is dropped in the student’s fourth semester of attendance. The "EOP Advisor" role remains throughout the time students are enrolled as undergraduates. Read below for additional information on the EOP Advisor role.
PPRO - Pre-Professional Academic Advisor (Pre-Law, Education)
- Listed in addition to the Faculty/Academic Advising Center, EOP and/or CCAE Advisor
PHEA - Pre-Health Profession Academic Advisor (Pre-med, Pre-Vet, Pre-Optometry, Pre-Pharmacy, Pre-Physical Therapy, Pre-Veterinary)
- Listed in addition to the Faculty/Academic Advising Center, EOP and/or CCAE Advisor
SPEC - Specialty Co-Curricular Advisor (INRSEP)
- Listed in addition to the Faculty/Academic Advising Center, EOP and/or CCAE Advisor
THES - Thesis Committee
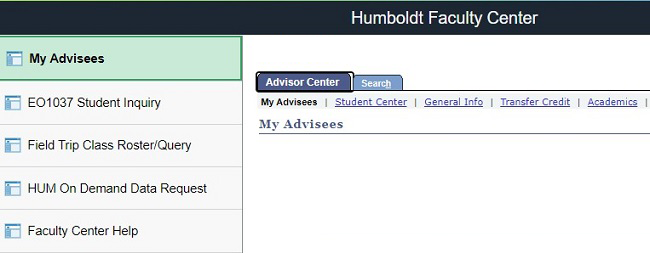
Step 1. Go to Faculty Center. The My Advisees tab will be open (default).
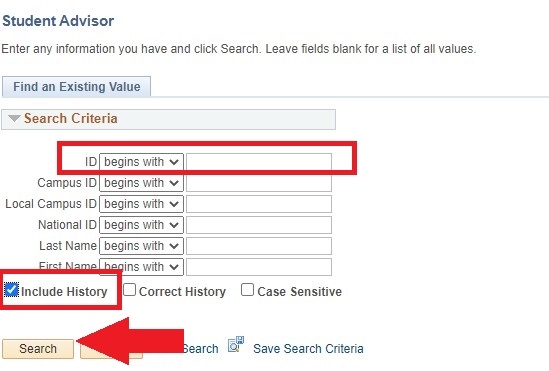
Step 2. Enter student’s ID number.
Step 3. Select the “Include History” checkbox.
Step 4. Select the “Search” button
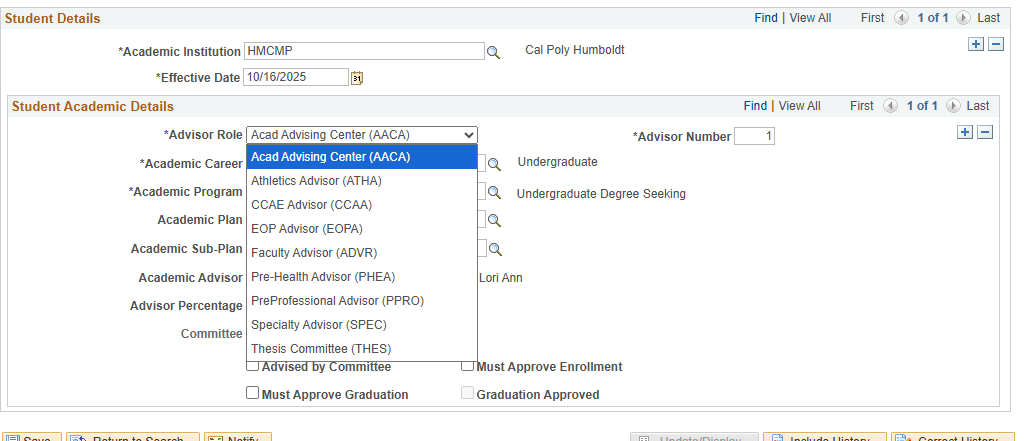
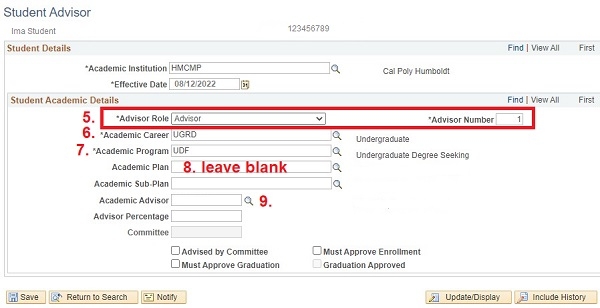
Step 5. Select appropriate “Advisor Role” using the dropdown menu. The “Advisor Number” field is populated automatically.
Step 6. Select the appropriate “Academic Career” using the magnifying glass search icon.
Step 7. Select the appropriate “Academic Program” using the magnifying glass search icon.
Step 8. Leave the “Academic Plan” field blank.
Step 9. Select the magnifying glass search icon next to the “Academic Advisor” field.
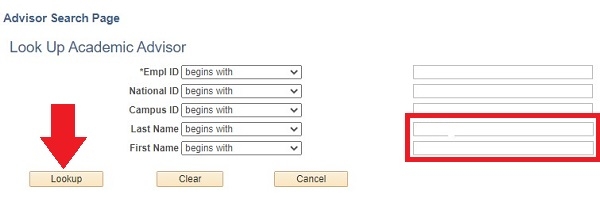
Step 10. Enter advisor’s full or partial Last Name and/or First Name.
Step 11. Click the “Lookup” button.
Step 12. Click the "Select" button next to the appropriate advisor's name.
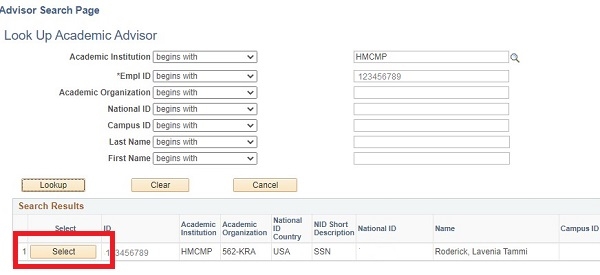
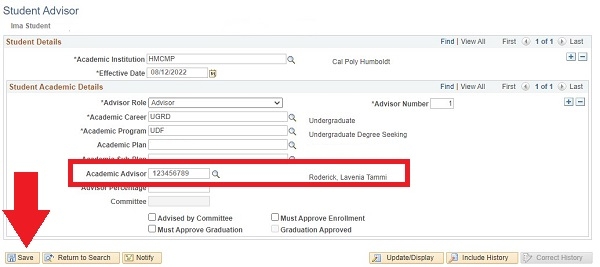
Step 13. The advisor's information will populate the Academic Advisor field. Click Save to finish the process.

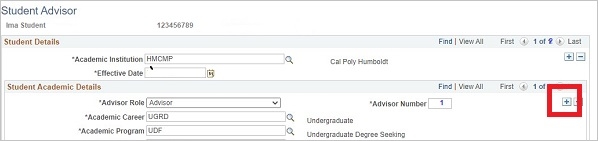
Step 1. Navigate to the appropriate student’s record. If there is an EOP advisor assigned, do not remove. You may add another advisor.
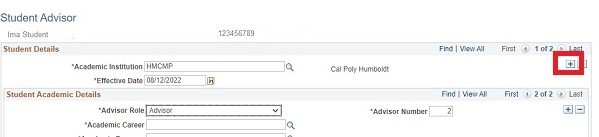
Step 2. Click on the upper “+” (plus sign) to add a new row. Some of the data will copy from the previous record.
Step 3. Click on the lower “+” (plus sign) to add a new advisor row.
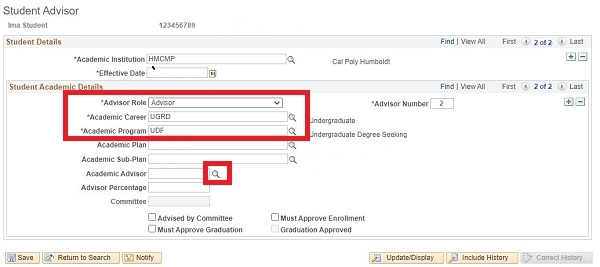
Step 4. Select appropriate “Advisor Role” using the drop-down menu. The “Advisor Number” field is populated automatically.
Step 5. Select the appropriate “Academic Career” using the magnifying glass search icon.
Step 6. Select the appropriate “Academic Program” using the magnifying glass search icon. Note: Leave the “Academic Plan” field empty.
Step 7. Click on the magnifying glass search icon next to the “Academic Advisor”.
Step 8. Follow steps 10-13 in Assign an Advisor (New Student).
Step 9. Click the “Save” button to complete the process.
Step 1. After you navigate to the appropriate student’s record, select the upper “+” (plus sign) to add a new row.

Step 2. Some data will copy from the previous record. Delete the former advisor’s ID number from the “Academic Advisor" field and find the new advisor using the magnifying glass lookup icon.
Step 3. Follow steps 10-13 in "Assign a student's advisor” (for new students) above for screenshots of advisor search and select.
Step 4. After the new advisor's information is added, click on the “Save” button to update the student's record.